WordPress Instructions
Much of this will be familiar a combination of Word and MailChimp or FloDesk. Remember: you cannot break it. I can always roll the site back or fix anything. WordPress is literally the easiest web building platform in the world AND the most forgiving.
VOCAB: POST is entire blog post. BLOCK is each segment in the POST. WP = WordPress (this interface)
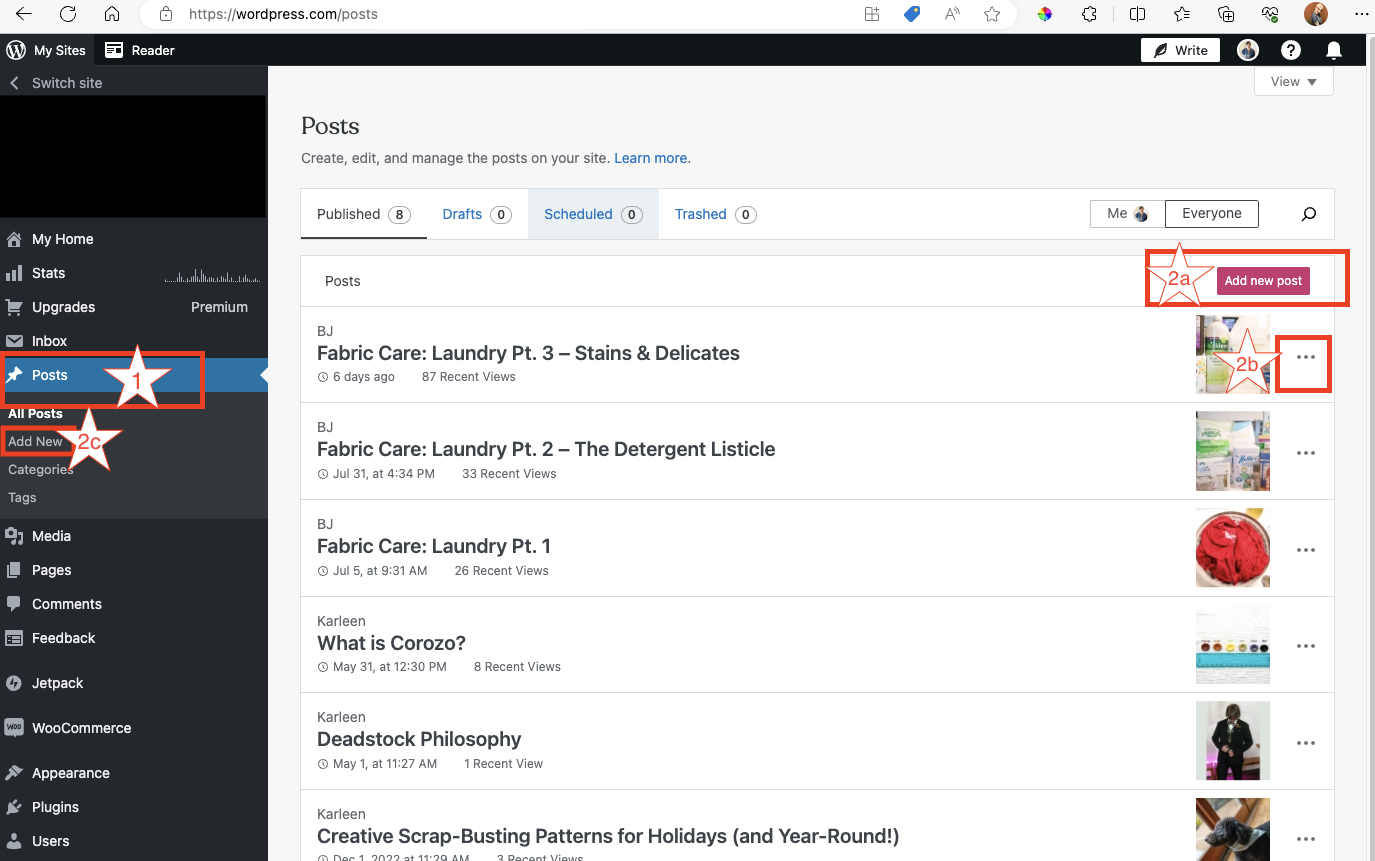
Log in and go to Posts
- This is where you change where you are in the site.
- Start a New Post
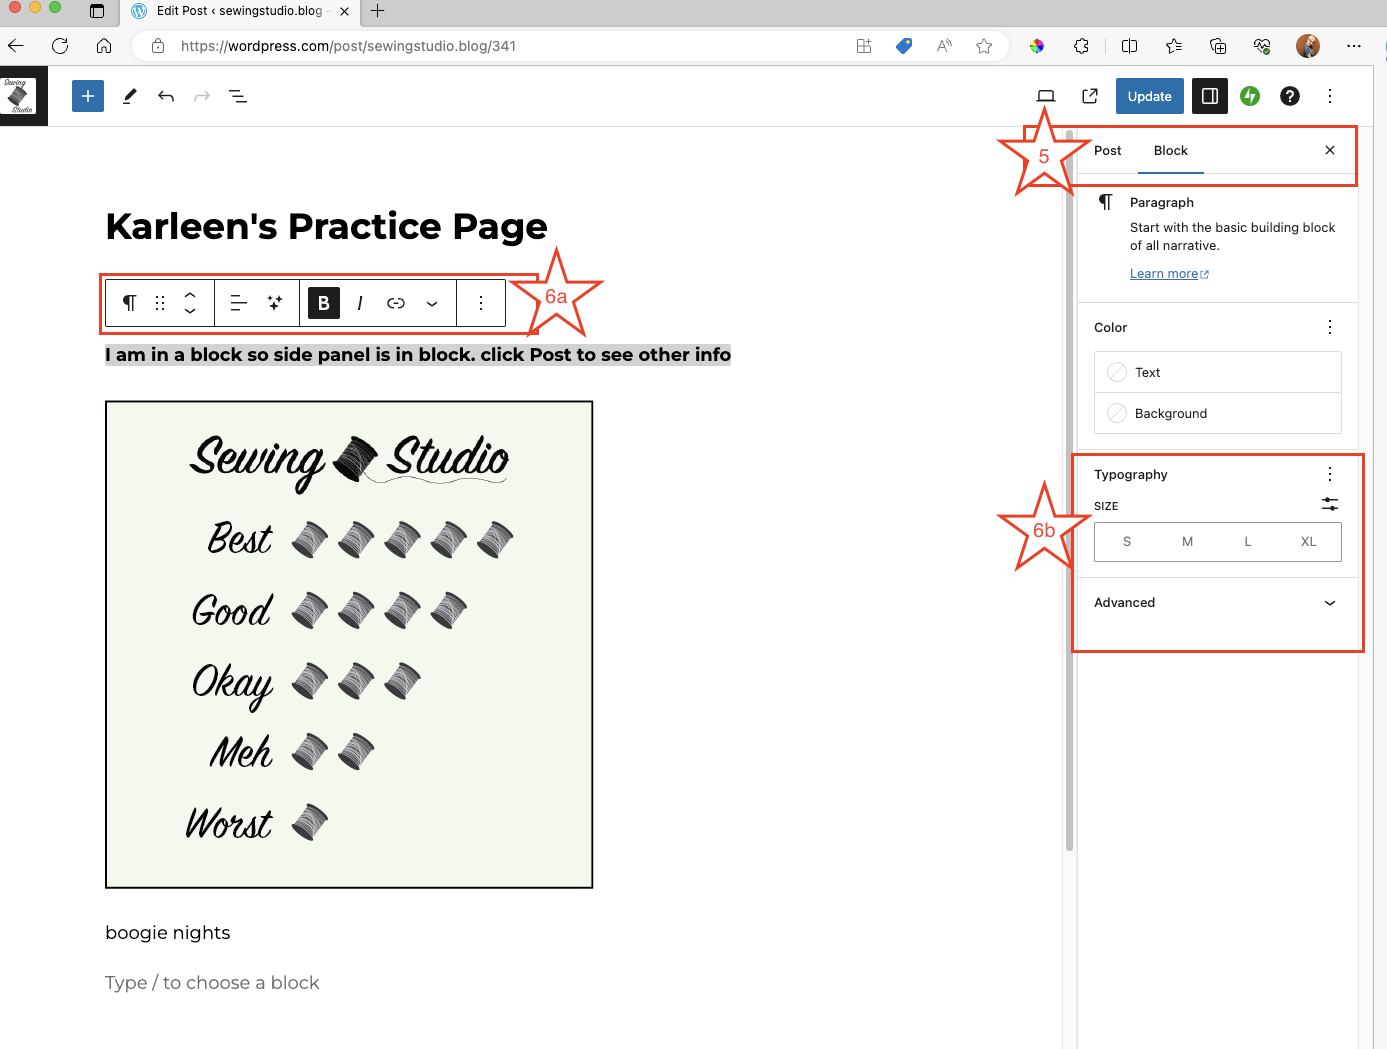
- a. You can use this button (my favorite)
- b. Or this and make a copy to write over (I don’t recommend this until you know all the things you need to do)
- c. Or this
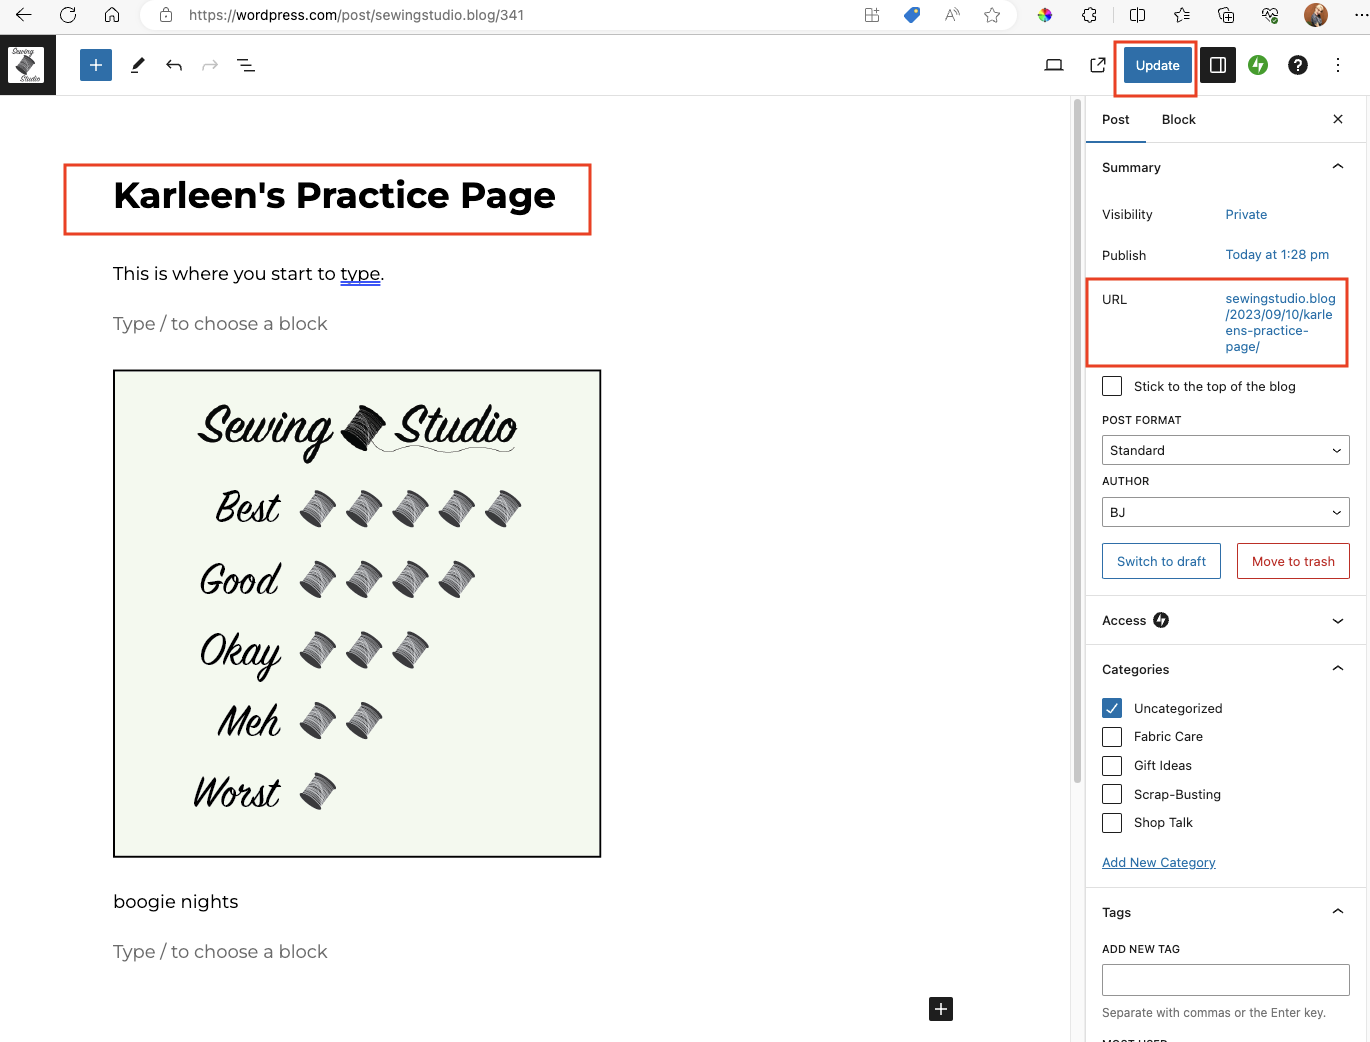
- First make your title (if you’re not seeing the right side panel the same way as in image, go to #5 or click Post as underlined in side panel to toggle between Post and Block)
- a. Save Draft. Safe Draft is missing from next to Update right now because I already saved it, but it will be there. It will autosave, ask you if you want to save before you leave if you haven’t, and you can hit the Update button as you work
- b. The URL is auto-generated to have your title in it.
- This is important. The URL *usually* will auto change if you change the title but double check
- Even if you haven’t Published the post, you can take this link and put it in emails to schedule BOTH to launch at the same time. You’re starting to get subscribers to your blog posts – just a handful so far, but they are currently seeing posts before the email announces the post. If you have a chatty audience, this can get confusing, so you can schedule them to go at the same time. More on all this later.
- At anytime you can look at what the post would look like once published. This is just a preview.
- You can choose view to be phone/tablet/desktop. The majority of your audience is currently on desktop.
- I recommend previewing in new tab so that you don’t accidentally lose your work window, but again, if you do, it’s really hard to lose anything or mess it up.
- I’ve put this post in Private but normally you’d want Public. This one is Private so you can practice posting and scheduling, but no one but you and I will be able to see it.
- Side note. This is why it is ALWAYS ALWAYS important you trust your web helpers. This is actually also why LikeSew is such a pain to dig into. They are protecting their hosting. I could make secret pages on this site that are used for phishing and spam. I can make spoofing emails on your domain that look like they’re from Bank of America and link to a hidden/private page on YOUR site that looks like a Bank of America site, spoof the URL, and collect victims’ information. When it gets turned in and tracked, it will all be on your site, coming from your URL, and you will be held responsible.

- Did you get lost? It’s ok. Toggle between entire Post options and just in the Block you’re in options here.
- Like most things, there are multiple ways to accomplish the same thing. You find your flow.
- a. One way to change your text (within reason, you do have a CSS that will not allow certain things so the aesthetic is uniform), copy/duplicate a block, move a block.
- b. Same as a. play with these.
7. One way to start a new block
a. Hover over here
b. This plus sign will appear
c. Options of what to insert appear here. If you don’t see the one you want, hit browse all
Explore Browse All. There’s an Instagram widget. Insert one of your Instagram posts or you can experiment here with Made By Sewing Studio to showcase makers if you’re feeling blank on a month’s blog post idea. People love to see themselves on the internet. Once you share that in an email too, you’ll get even more mentions.
You have image layout options. Lots. Again experiment with even more here.
You can make grids, star rating systems (I custom made yours with jpgs but you can do this too), event countdowns…your options are limitless

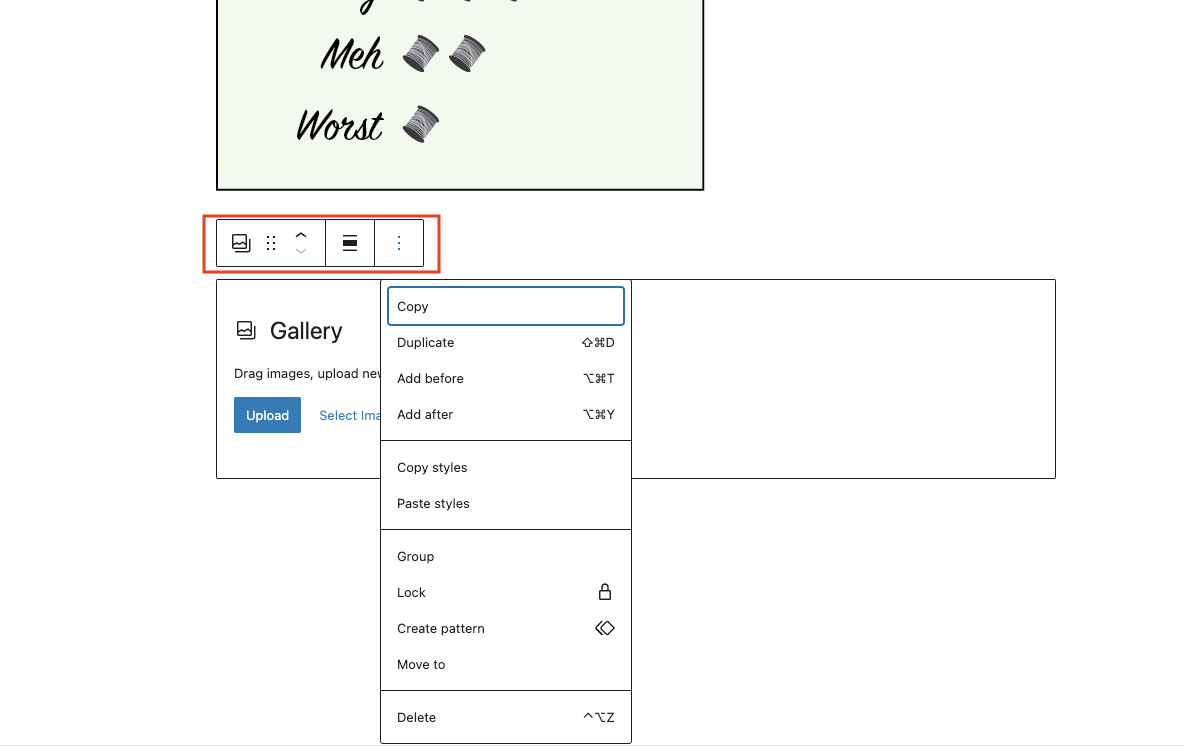
- You can click on any block with stuff in it, the options box will open, and the 3 dots will give you another drop down with more options.
- Move, copy, delete, add a block before/after – WP is overly user friendly.
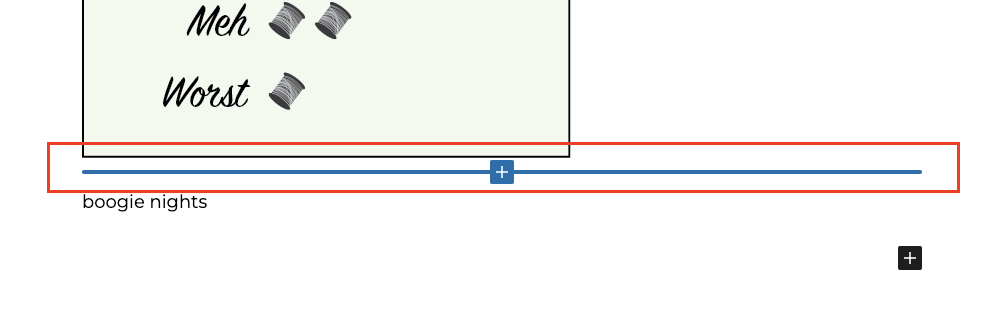
- If you hover between two blocks, a line with a + box will appear to insert another block. So let’s say you want to go back and insert something you forgot, or maybe you type out your paragraphs/outline, then want to put photos in later. You can do that. You can also move Blocks up and down and insert where the blue line is either by hand (cursor) or by options/move up/down.
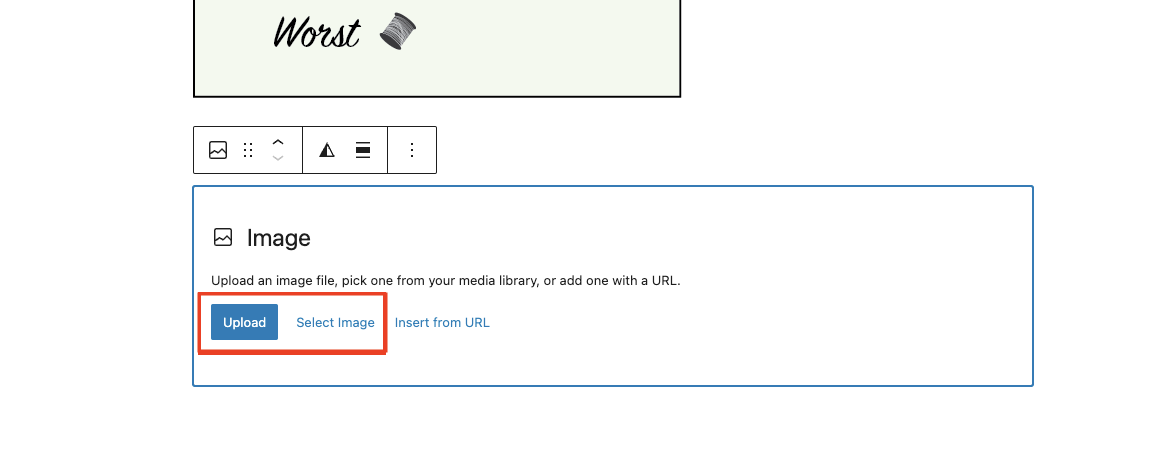
- Inserting image
- New block. Choose to upload a new photo from your hard drive or cloud drive to your WP media library (more on this later), or select an image already in your library. I’m not a fan of inserting URLs for images – creates more places for things to break.
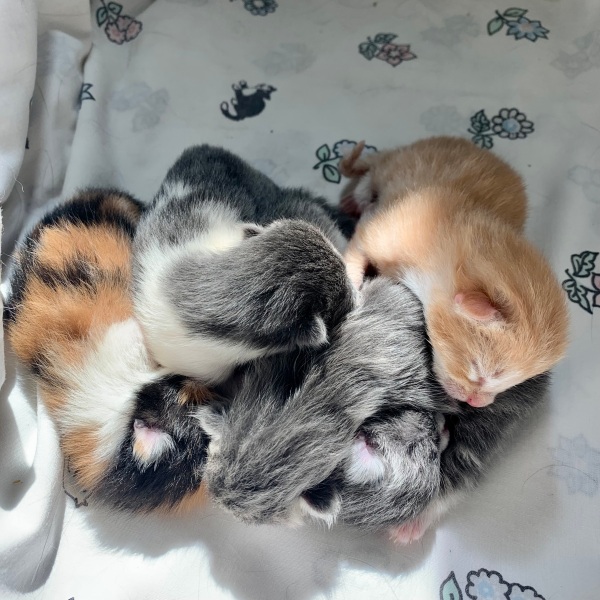
- Your site will NOT format to 1:1 ratio (square) for you. I’ve been cropping to that size or putting images on top of a Brand ID green square. You can do this in Canva.
- New block. Choose to upload a new photo from your hard drive or cloud drive to your WP media library (more on this later), or select an image already in your library. I’m not a fan of inserting URLs for images – creates more places for things to break.